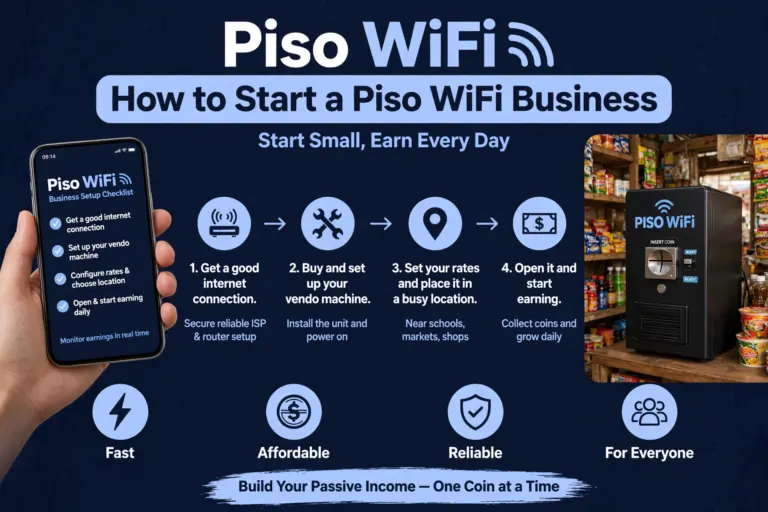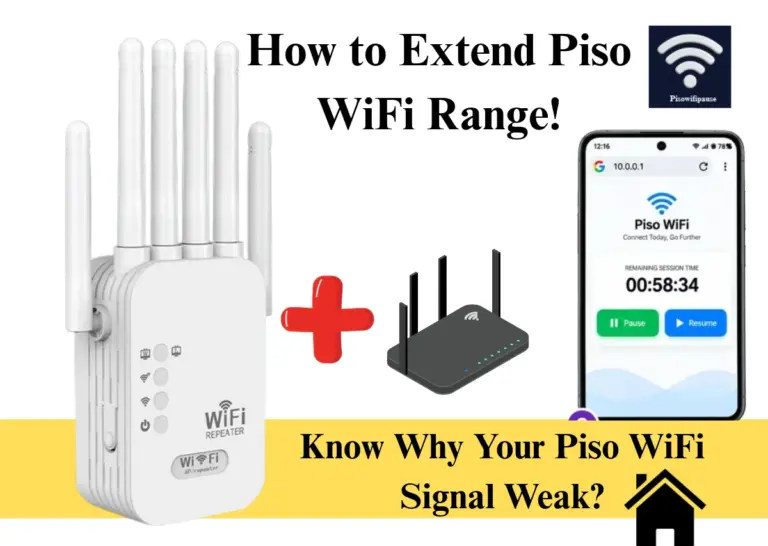
Starlink Piso WiFi Philippines: Setup, 10.0.0.1 Login, Pause Time and Price 2026
Starlink Piso wifi is one of the most famous and efficient business models in the Philippines that has benefited a large number of the population by providing streamlined network supply.
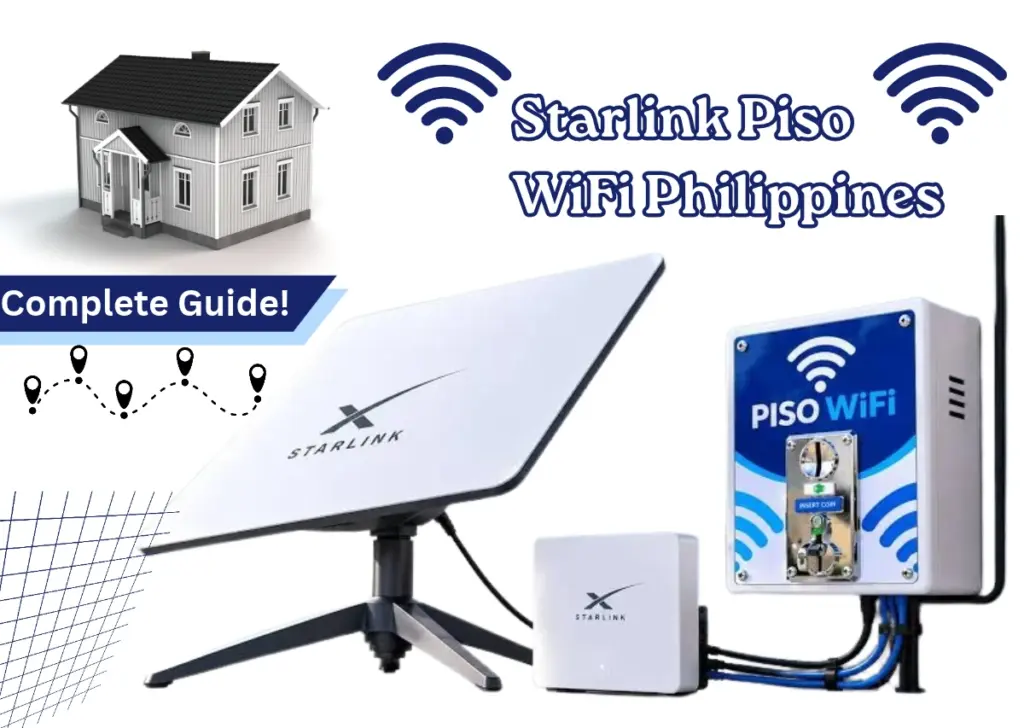
This model runs by combining the high-speed satellite internet of Starlink with the coin-operated Piso WiFi Vendo machine, it works effectively in places where Fiber and DSL can not reach.
This guide will take you through the setting up of Piso wifi vendo machine with starlink connection, trying to access the admin portal at 10.0.0.1, how to manage starlink piso wifi pause time, Starlink Piso WiFi login and many more!
Quick Answer: Can You Use Starlink for Piso WiFi?
Yes, piso wifi pause time vendo machine can work together to supply a hassle-free internet timing. Starlink Piso WiFi combines a standard Piso WiFi vending machine with a Starlink internet service. The device consists of a router, coin validator, digital payment method, and firmware like LPB, AdoPiSoft, or JuanFi.
What Is Starlink Piso WiFi?
Now understand it better that what is exactly a starlink piso wifi: Starlink piso wifi is a piso wifi vendo machine powered by a Starlink dish instead of fiber, DSL, or a SIM card. This makes piso wifi with Starlink connection appealing in barangays with no fiber. Starlink can reach almost anywhere with a clear sky view, which regular ISPs can’t always guarantee
The machine works the same way. Customers connect, insert a coin or pay via GCash for coinless piso wifi, and get timed internet access. Only the internet source changes.
Normal Piso Wifi Vs Starlink Piso Wifi
| Feature | Regular Piso WiFi | Starlink Piso WiFi |
|---|---|---|
| Internet Source | PLDT, Globe, Converge, or 4G/5G | Starlink satellite |
| Best For | Cities and areas with fiber internet | Remote areas and islands without fiber |
| Setup Cost | ₱6,000–₱30,000 | Piso WiFi machine + Starlink equipment |
| Monthly Internet Cost | ₱1,500–₱2,500 | ₱1,950–₱4,099+ |
| Connection Reliability | Depends on local ISP | Requires a clear sky view; heavy rain may affect service |
| Commercial Use | ISP resale permission required | Starlink plan must permit intended commercial use |
Which one is better? Regular Piso WiFi is generally more affordable in areas where reliable fiber is available. Starlink Piso WiFi is worth considering in remote areas without reliable internet access, provided the plan allows your intended use.
Is 10.0.0.1 the Starlink Login?
No, 10.0.0.1 is not the default login of Piso wifi. Starlink utilizes 192.168.100.1 (or dishy.starlink.com) to monitor dish status and statistics.
What Is 10.0.0.1?
10.0.0.1 serves as a default gateway address for private IPv4 networks, frequently utilized by home routers, cable modems, and enterprise networking devices – especially by Comcast Xfinity, Cisco, Arris, and Piso WiFi setups in the Philippines.
Starlink Admin Is Not 10.0.0.1
Starlink routers do not use an admin web browsing at 10.0.0.1. Starlink, rather, controls settings using an app-based method or through designated local terminal addresses.
How to Open the Piso WiFi Portal at 10.0.0.1
Following are the simple steps for users to open the Piso wifi portal at 10.0.0.1:
1. Open the Wi-Fi settings on your phone.
2. Find and select the available 10101 piso wifi network. The name may appear as LPB Piso WiFi, AdoPisoWifi, Starlink Piso WiFi, or the store’s name.
3. Connect to the network. Most Piso WiFi hotspots do not require a Wi-Fi password.
4. Open Google Chrome or any browser. You have to Type http://10.0.0.1 directly in the address bar, not the search bar, then press enter.
Note: Do not search for it on Google. And if you use a VPN, turn it off first.
How Does Starlink Piso WiFi Work?
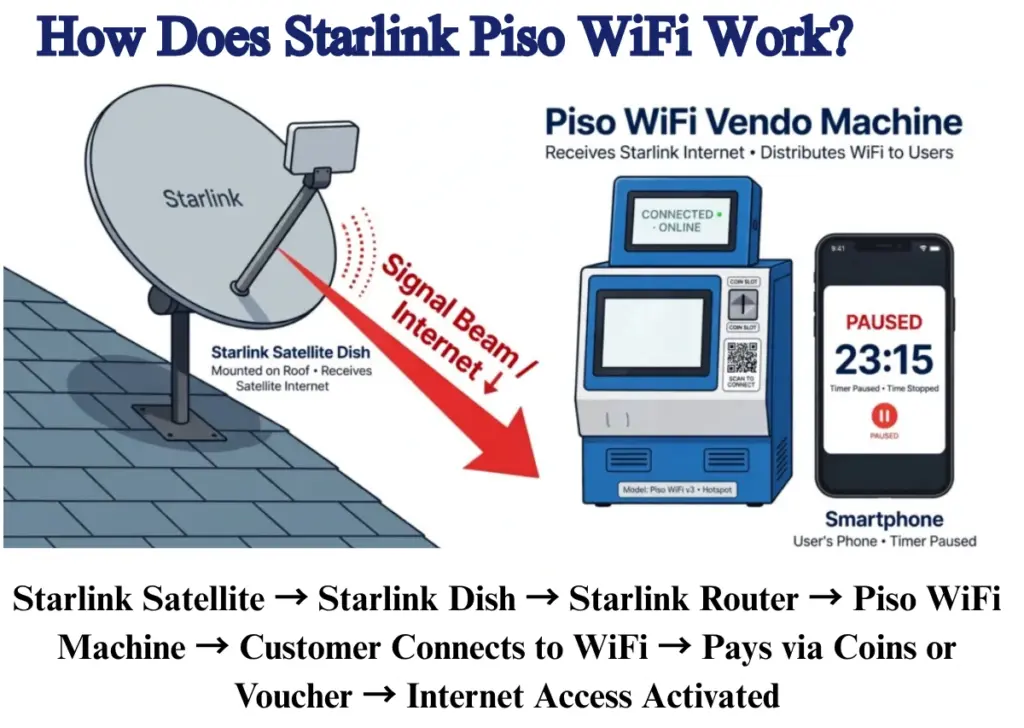
Below is a very simple statement that shows the working model of Starlink Piso Wifi 1001 Machine:
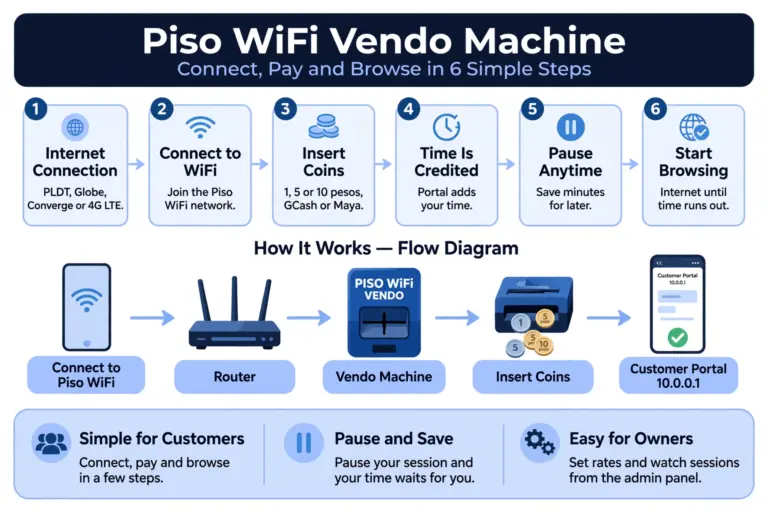
Starlink Satellite → Starlink Dish → Starlink Router → Piso WiFi Machine → Customer Connects to WiFi → Pays via Coins or Voucher → Internet Access Activated
Starlink Dish
The starlink dish is connected to the satellite network that provides connectivity to your Piso WiFi setup. It is important to install it in an outer surface under the sky with no obstacles to gain a complete network flow that can be hard to find if the router is placed inside the house.
Starlink Router and Bypass Mode
The Starlink dish provides internet to the router, which links it to your Piso WiFi network. Using a standalone Piso WiFi router allows you to activate Bypass Mode on compatible Starlink devices, preventing double NAT and enabling your Piso WiFi router to control the local network.
Piso WiFi Router and Vendo Machine
Connect the Starlink network equipment to your Piso WiFi router’s WAN port, then configure your hotspot settings, WiFi name, pricing, and session limits. Test the connection and payment system before allowing customers to use it.
Portal, Pause Time and Vouchers at 10.0.0.1
Then customers uses Starlink piso wifi network by coin operated vendo machine. They pay with coins, vouchers or a supported digital payment method. The session ends, pauses or continues depending on the firmware settings.
How to Set Up Starlink Piso WiFi
Here are the simple steps and procedure for the owners to install Starlink Piso Vendo Machine in their area:
1. Verify Starlink coverage in your location through the app or website.
2. Enroll in a Priority (business) plan, rather than Residential.
3. Position the dish in an area with a clear, unobstructed line of sight to the sky.
4. Link your piso wifi router (e.g. TP-Link TL-MR6400) to the LAN port of the Starlink router.
5. Set up your piso wifi firmware (LPB, AdoPiSoft, or JuanFi) with your rates for coins and session durations.
6. Configure your coin acceptor or integrate GCash/Maya payments.
7. Assess the complete process: link up, make payment, access online, disconnect promptly.
8. Enroll your business with the DTI as a sole trader.
Attention: Starlink Terms Of Services
Read this before spending your pesos. Starlink’s home plans are available solely for individual and family use. Operating a Piso WiFi business for commercial purposes on a residential plan violates the terms of service.
This is not just a theory. In March 2026, Starlink began sending emails to Philippine home users who were reselling their connection as piso WiFi. The emails reference a violation of terms of service and caution about limited speeds or account measures.
Factors that instigate the enforcement:
What this implies for you:
This does not constitute legal advice. It serves as a caution to safeguard your investment. A terminated account indicates a failed vendor and dissatisfied clients.
Starlink Bypass Mode for Piso WiFi – Turn On Bypass mode on starlink App
Bypass mode lets you disable the Starlink router and connect a third-party router straight to Starlink(e.g: Gen 2 Router). When bypass mode is turned on, the WiFi functionalities of the Starlink router are entirely turned off.
Bypass mode can be activated in the Starlink app within the “Settings” section. You can execute a factory reset to turn off bypass mode. The application is unable to disable bypass.
How To Turn On Bypass Mode On Starlink App
Here are the steps for enabling bypass mode in to your gen 2 router:
1. Connect the Starlink Ethernet Adapter to your Gen 2 router.
2. Plug an Ethernet cable from the adapter into the Internet (WAN) port of your third-party router.
3. Ensure all connections are tight.
4. Launch the Starlink application and navigate to Settings.
5. Activate bypass mode. The Starlink router’s Wi-Fi shuts off, indicating bypass mode with a violet light.
6. Allow the connection some time to stabilize, then check it on your own router’s Wi-Fi.
Choose Right starlink plan Before Setup
In the Starlink plan, it is essential that customers are charged for utilizing your internet connection. Starlink’s existing terms generally do not allow the resale of internet services unless explicitly authorized by Starlink.
The cost of your internet each month is based on the quantity of Priority data you select. Starting September 2026, Starlink offers Local Priority 50 GB for ₱1,650 monthly in the Philippines. Larger plans can be accessed by companies that require additional data.
| Plan | Monthly Price |
|---|---|
| Local Priority 50 GB | ₱1,650 |
| Local Priority 500 GB | ₱4,650 |
| Local Priority 1 TB | ₱8,400 |
| Local Priority 2 TB | ₱15,900 |
10.0.0.1 Starlink Piso WiFi Login
Once the 10.0.0.1 Starlink System has been set up then a customer can easily login to its landing page via local internet network.
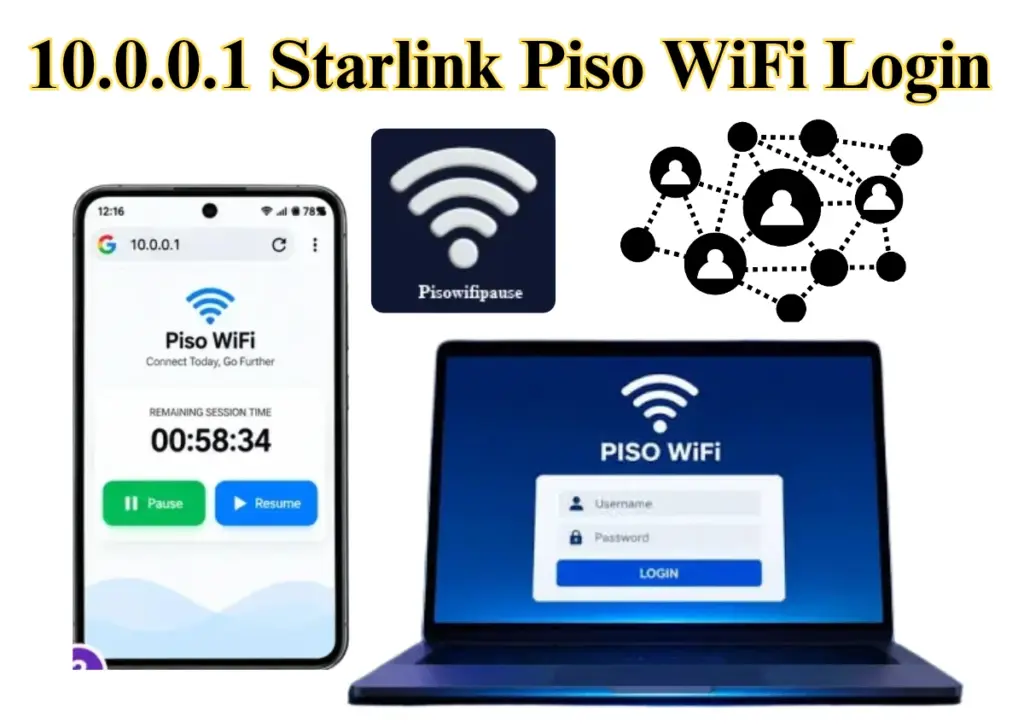
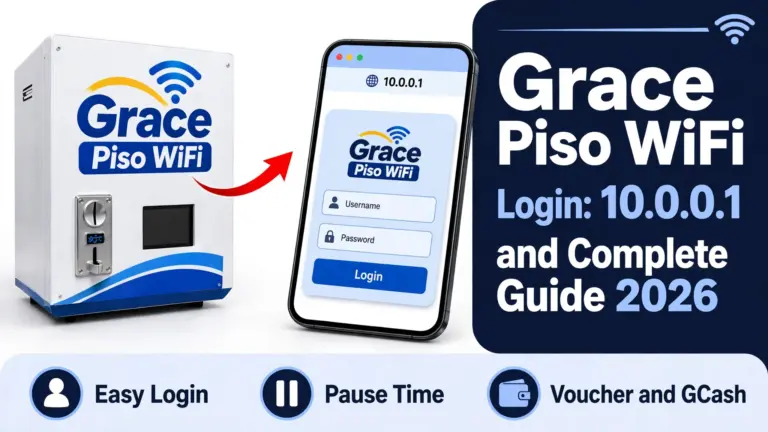
Customer Login at 10.0.0.1
The local portal will launch once your device is connected to the machine’s WiFi network. If you connect using mobile data or a different WiFi network, the page might not load. To connect to the Starlink WiFi, adhere to the instructions outlined below.
1. Connect your phone or laptop to the Piso WiFi network.
2. If needed, turn off mobile data.
3. Launch Chrome, Safari, or another web browser.
4. Enter http://10.0.0.1 in the URL field.
5. Allow the customer portal to finish loading.
6. Choose the payment/session choice.
Starlink Piso WiFi Passwords: Three Different Passwords
It is important to secure your Starlik Piso Wifi business secure by managing it with the application of strong and protective passwords. It secures your network, prevents unauthorized free usage, and keeps your vending business profitable.
There are three different passwords needed for Starlink peso system.
Starlink WiFi Password
By default there is no Pisso wifi password, as it is open for all the users to connect via this hassle-free network system.
To create or update your Wi-Fi password, use the official app:
1. Connect your phone or device to your Starlink Wi-Fi network.
2. Open the Starlink App.
3. Go to Settings > Router (or Settings > Network).
4. Enter your desired Wi-Fi Network Name (SSID) and Wi-Fi Password.
5. SSID length: 4 to 32 characters.
6. Password length: 8 to 32 characters.
7. Tap Save
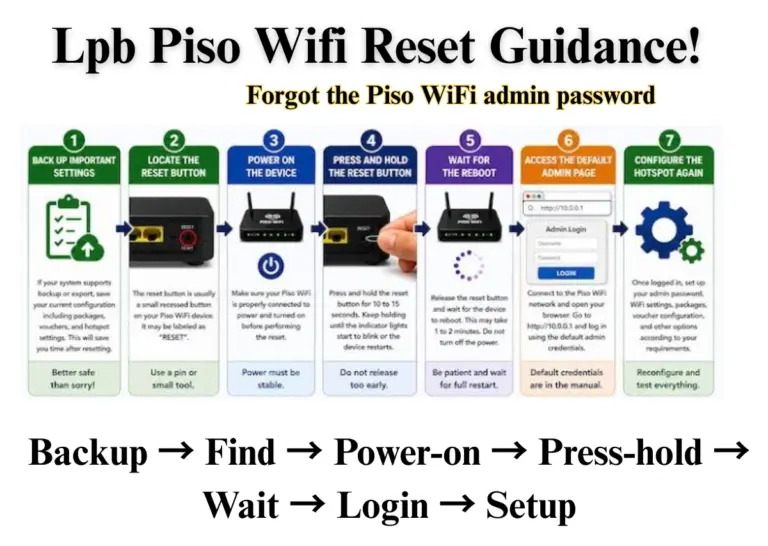
Piso WiFi Admin Password
Securely access your Piso WiFi admin panel to manage network settings, update passwords, and control your WiFi connection.
Voucher Codes for Customers
Generate and manage Piso WiFi voucher codes to provide customers with convenient internet access based on their purchased time or usage.
Starlink Piso WiFi Pause Time
Once configured, piso wifi pause time has the same procedure for the starlink connected device as for the normal vendo operater:
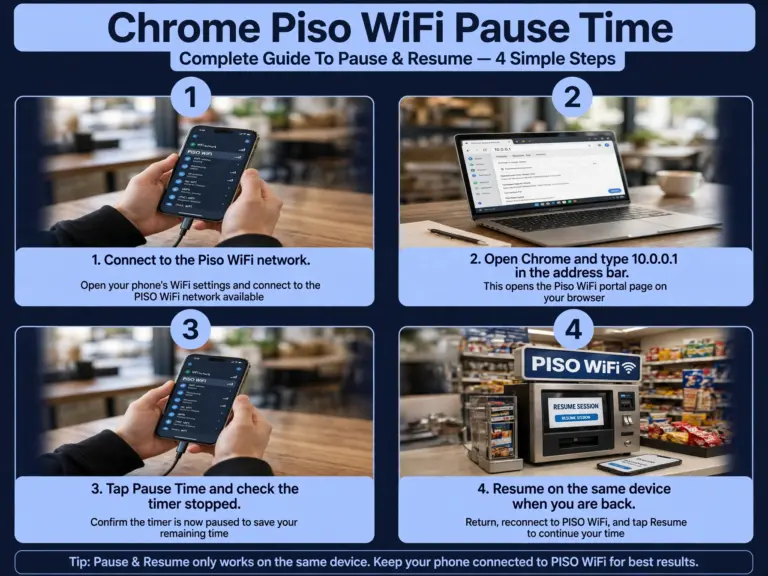
1. Link to the Network: Link your laptop or phone to the Piso WiFi network.
2. Connect to the Piso Wifi Portal: To access the lpb Piso WiFi portal at lpb.wifi/index.php, type 10.0.0.1 into your browser.
3. Start Your Session: Use the various payment choices to pay for internet access by following the on-screen instructions.
4. Pause Your Internet Time: To temporarily halt your session timer, touch the Pause button if the hotspot supports it.
5. Resume When Ready: To continue utilising your remaining internet time, go back to the portal and select Resume.
Starlink Piso WiFi Rate Card
Most piso wifi owners set price rate based on peso value per minute.
A typical rate card looks like this: Because Starlink’s monthly cost runs higher than fiber, some Starlink piso wifi operators adjust their rate card slightly upward, for example ₱1 for 10 minutes instead of 15. This helps offset the higher connectivity expense without pricing out customers.
| Amount | Time |
|---|---|
| ₱1 | 15 minutes |
| ₱5 | 1 hour |
| ₱10 | 3 hours |
| ₱20 | 8 hours (day pass) |
Test a few rate structures in your first month. Adjust based on how quickly customers top up and how much bandwidth gets used.
Starlink Business Options
Several Philippine piso wifi providers now present franchise-like packages that combine the vending machine, firmware license, and installation assistance into a single offering.

A Starlink piso wifi franchise generally doesn’t encompass the Starlink equipment or subscription itself. You still have to buy and register that individually, as it’s linked to your personal Starlink account. Starlink internet plans.
Prior to signing up for any piso wifi franchise, check what is truly included. Certain packages provide coverage solely for the machine and firmware, placing all connectivity expenses on you. Request a written breakdown before making any payment for the franchise fee.
How To Register Your Starlink Piso Wifi Business
Registering the Starlink Piso Wifi Business has the following procedures to take:
1. Register your business name with the DTI if you are a sole proprietor.
2. Obtain a Barangay Clearance from the barangay where your equipment will be set up.
3. Request a Mayor’s Permit (Business Permit) at your nearby municipal or city hall.
4. Sign up with the BIR to obtain your Tax Identification Number and official receipts.
A frequent error is directly starting the machine after DTI registration. Without the Mayor’s Permit and Barangay Clearance, local authorities may flag or shut down your machine, regardless of your DTI documentation being correct.
Starlink Piso WiFi vs Fiber vs 4G/5G
| Feature | Starlink | Fiber | 4G/5G |
|---|---|---|---|
| Best for | Remote areas with no fiber line | Towns and cities with a fiber line | Temporary setup or backup |
| Where it works | Anywhere with a clear sky view | Only where a fiber line is installed | Where mobile signal is strong |
| Speed | Fast, usually 50 to 200 Mbps | Fastest, usually 50 to 500 Mbps | Varies a lot, 10 to 100 Mbps |
| Reliability | Good, but heavy rain can slow it | Most stable, works in any weather | Drops when signal is weak or crowded |
| Setup | Dish, clear sky, and Ethernet adapter | Needs a fiber line and installation | Just a SIM and a router |
| Monthly cost | Highest | Lowest for the speed you get | Varies, data promos can add up |
| Ping | Higher than fiber, fine for browsing | Lowest, best for gaming and calls | Varies with signal |
| Users at once | Good for a small to medium vendo | Best for many users | Few users only |
Short takeaway: if fiber is available, use fiber. If there is no fiber line, Starlink is the best choice. Use 4G/5G only as a backup or for a small setup.
Starlink Piso WiFi in Remote Barangays and Islands
Starlink provides coverage throughout the Philippines from orbit. Any barangay with an unobstructed sky view can receive a signal, including islands and mountain areas that will never be reached by fiber. That is the aspect of satellite coverage.
The WiFi coverage aspect is identical to any vendor. The access point determines the distance at which customers can connect.
| Setup | Typical WiFi range (open area) |
|---|---|
| Vendo built-in radio | Around 45 meters |
| With outdoor access point | 150 to 200 meters |
| With high-gain antenna | Up to 300 meters |
Satellite coverage gives you the internet anywhere. Your access point decides how many neighbors can buy it. Spend on the access point if your customers are spread out.
DICT Starlink Projects in Remote Areas
The Department of Information and Communications Technology (DICT) utilizes Starlink to provide internet access to underserved regions of the Philippines. In Pampanga, the DICT operates 46 active free WiFi locations with 127 hotspots, utilizing Starlink for difficult-to-access areas such as island barangays in Sasmuan.
Starlink Piso WiFi for a Sari-Sari Store
Integrating a Starlink satellite internet setup with a coin-operated Piso WiFi machine at a sari-sari store is favored in remote or off-grid regions of the Philippines where conventional broadband (such as PLDT, Globe, or Converge) is inaccessible.
Starlink Piso WiFi Business Setup Checklist
Is There a Starlink Piso WiFi Franchise?
There is no official Starlink franchise in the Philippines. Starlink does not sell franchise rights to individuals. Any “Starlink franchise” offer you see online comes from a third party.
What sellers usually mean by “franchise”:
Starlink Piso WiFi Troubleshooting
Users as well as owners find many complications during connecting or running Starlink Piso Wifi. Therefore, this guide has divided those problems into the following categories.
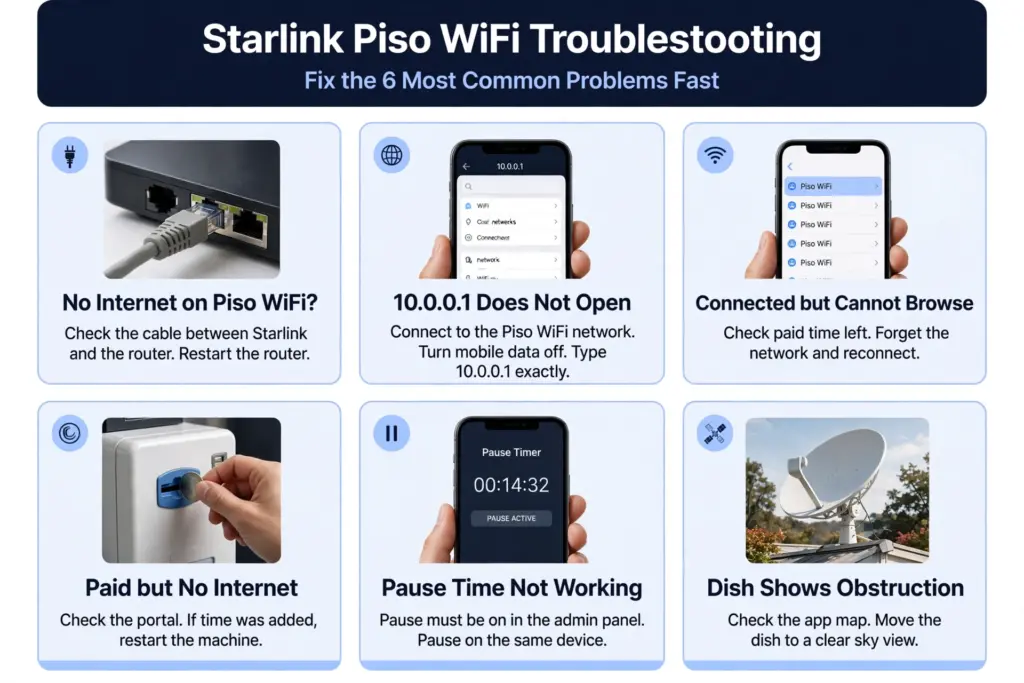
Starlink Is Online but Piso WiFi Has No Internet
Check the cable between Starlink and your Piso WiFi router first. A loose or unplugged Ethernet cable is the most common cause.
Restart the Piso WiFi router, then open the portal at 10.0.0.1 again. If Starlink works on its own WiFi but the vendo has no internet, the link between Starlink and the router is the problem, not Starlink itself.
10.0.0.1 Does Not Open
Make sure you are connected to the Piso WiFi network, not your home WiFi or mobile data. Turn mobile data off. Type the address exactly: 10.0.0.1. An extra zero, like 10.0.0.0.1, does not work. If it still does not open, restart the vendo machine and try again.
Customers Connect but Cannot Browse
First check if the customer has paid time left. A session with no time left connects but cannot browse. Ask the customer to forget the network, reconnect, and open 10.0.0.1 again. If several customers have the same problem at once, restart the vendo machine.
Customers Pay but Get No Internet
Check the portal first. If the time was added, the payment went through and the problem is the connection, not the payment. Restart the vendo machine and ask the customer to reconnect.
If the time was not added, the coin may not have registered. Check the coin slot and the coin box, and give the customer their time back from the admin panel.
Pause Time Is Not Working
Pause works only if the owner turned it on in the admin panel, so check that first. The customer must pause on the same device they paid with, and check the timer stopped.
If the signal drops during a session, the timer on the portal keeps running, so pause before the signal drops or ask the owner to check the session.
Starlink Shows Obstruction
Open the Starlink app and check the obstruction map. It shows which side is blocked. Move the dish higher or to a spot with a clear sky view, away from trees, roofs, and walls. Even a small blocked part can cause short drops, so a clear view matters more than a high mount.
Starlink Piso WiFi Maintenance
Here are some of the tips to maintain your starlink connection:
Conclusion
Starlink enables Piso WiFi in areas where fiber is unavailable. With Bypass Mode activated and the cable connection to your vending machine correct, the configuration is straightforward, and pause duration, login, and vouchers at 10.0.0.1 function like regular Piso WiFi. If you operate a vending machine in a secluded location, Starlink is beneficial. If fiber is accessible in your location, fiber remains the superior option.