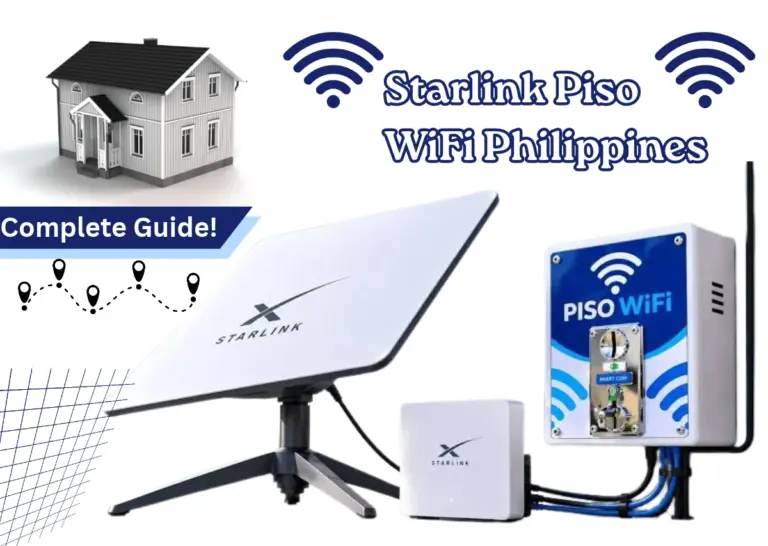
What Is Piso WiFi: Complete Guidance For Philippines Users
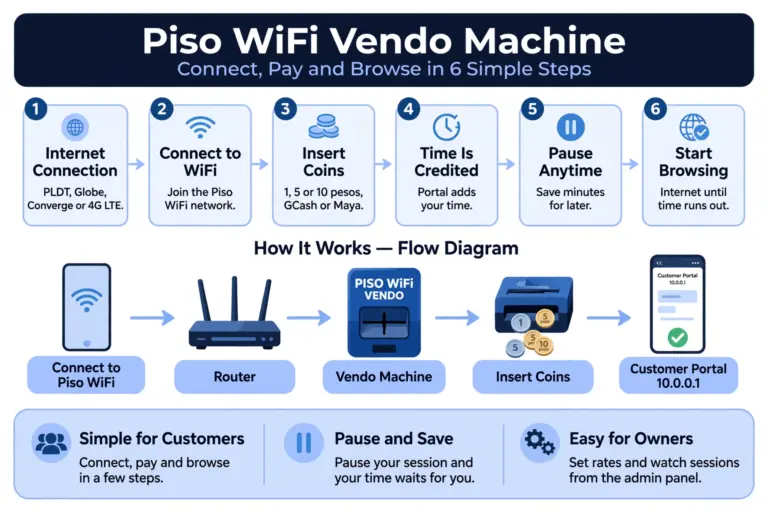
Piso WiFi is a pay-per-use internet service in the Philippines. You connect to a Piso WiFi vendo machine, pay with coins or a voucher, and use the internet for the time you paid for, without a monthly broadband plan.
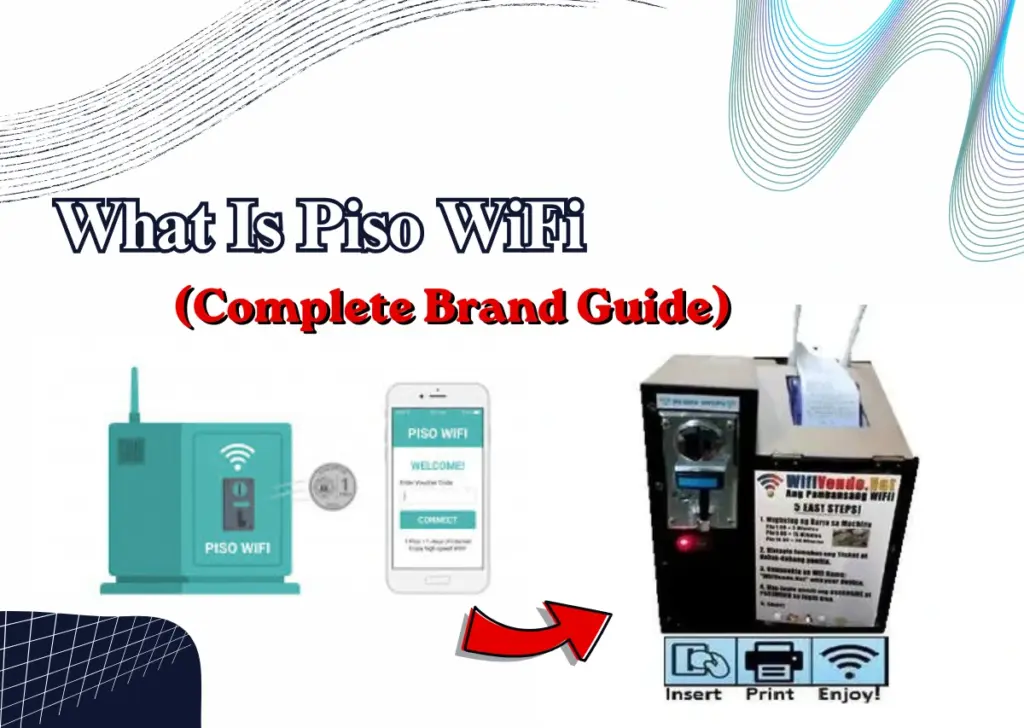
This guide explains what Piso WiFi Pause time is, how it works, and the popular brands in the Philippines. It also covers how to start a Piso WiFi business, set up a machine at home, use the admin login, stop or pause your session, and the important settings every owner should know.
What Is Piso WiFi?
Piso net Wifi is an internet vending system for the Philippine market that operates on a coin or voucher basis. “Piso” is the term used in Filipino for one peso, indicating the initial concept of using one-peso coins to access brief periods of internet service.
The idea surfaced in the early 2010s, as broadband access was lacking in numerous areas of the Philippines, leading independent operators to create coin-operated networks using modified routers to bridge the gap.
How Does Click Piso WiFi Work?
LPB Piso Wifi or sometimes it is also called single click Piso Wifi that starts upon connecting your device with the piso network on one click. One more reason for this name is that it prevents users from navigating multiple sites or menus by providing the connection in one go.
Join the network. Choose the WiFi network name displayed close to the device.
Access the Piso Wifi login page. Most configurations automatically redirect to the payment page at 10.0.0.1.
Press Insert Coin or input a voucher. This one click initiates the payment procedure.
Verify and explore. As soon as the payment is processed, your session starts right away.
Important reason: The one-click WiFi design is intended to minimize confusion for newbies. Previous systems required moving through multiple screens for network choice, authentication, and payments, which impeded casual users who simply wanted to get online swiftly.
What Is a Piso WiFi Vendo Machine?
A Piso WiFi Vendo Machine is a coin-operated device that enables users to connect to the internet by paying a minimal fee, typically beginning at ₱1. It is a widely used and cost-effective method to deliver internet connectivity in the Philippines, particularly in communities, local shops, educational institutions, and public spaces.
Popular Piso WiFi Brands in the Philippines
Not every Piso WiFi machine runs the same software. The software controls the portal, the rates, the pause option, and the vouchers. So the brand matters, especially for an owner.

Popular Piso WiFi Brands in the Philippines
| Brand / Platform | Type | Best For | What to Know |
|---|---|---|---|
| LPB Piso WiFi | Commercial | Beginners and ready-made setups | Simple admin panel, and it also works at lpb.wifi |
| AdoPiSoft (ADO) | Commercial | Owners who want pause control | Clear timer with Pause, Continue, and Resume |
| JuanFi | Open-source | Technical owners | Free and fully customizable, built on MikroTik RouterOS, needs more setup skill |
| Pisofi | Commercial | Voucher-based setups | Uses WiPass voucher codes |
| Sky Piso WiFi | Regional brand | Local buyers | Often similar hardware under its own label |
| Twin J Piso WiFi | Regional brand | Local buyers | Often similar hardware under its own label |
Here every user get their type of Piso connection and what they should choose:
If you’re new to this, opt for a pre-built commercial system such as LPB or AdoPiSoft.
If you understand networking and desire complete control, JuanFi is the adaptable choice.
Before purchasing a regional brand such as Sky or Twin J, ensure you verify the seller. Inquire about warranty, assistance, and post-purchase support, as these items are frequently marketed via Facebook groups and marketplace posts.
How to Start a Piso WiFi Business
It is a really easy and sufficient job to start a Piso Wifi business in the Philippines local area, as it does not require a lot of handwork or strategies because most of its work is done by the Piso Vendo Machine, from inserting coins to pausing the wifi session time.
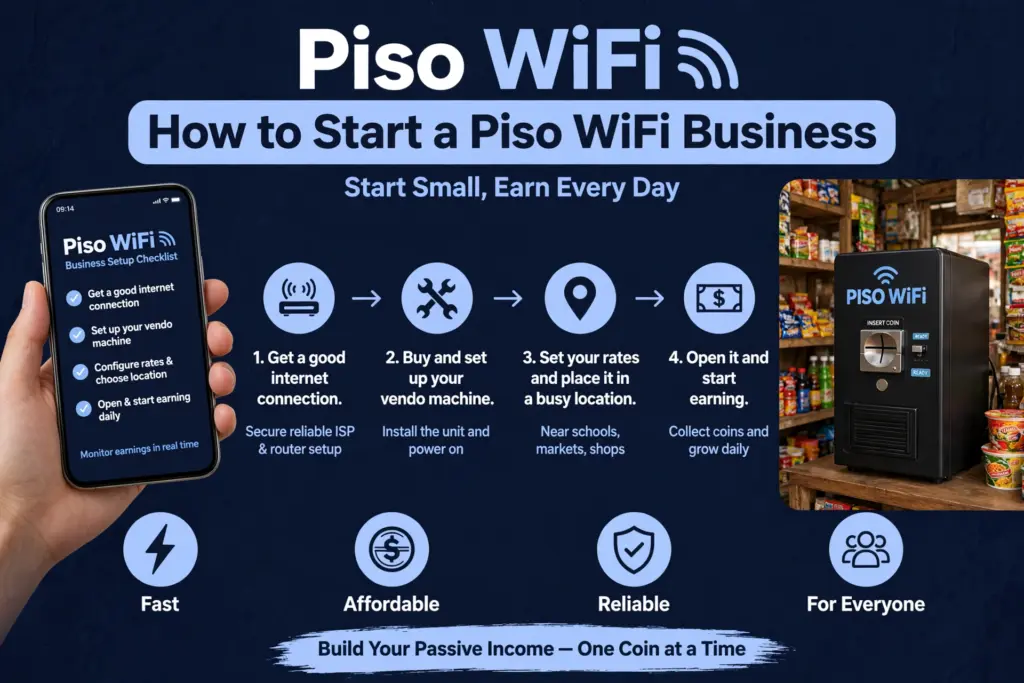
The business success does not depend on how well the setup is, it is basically boosted by the location and powerful connection.
What You Need to Start
Following are the five basic things that every person needs to start their business:
Piso WiFi vendo machine: coin slot, control board, and enclosure. You can buy a ready-made machine, or build one with a DIY kit.
WiFi router: this connects your machine to the internet and serves the customers.
Internet connection: a fiber line from PLDT, Globe, or Converge is best. If fiber is not available in your area, a 4G LTE SIM is the practical option.
Power source: a stable outlet, and a UPS is recommended, so a short power cut does not stop your machine.
A good location: a secure, weatherproof place with people walking past all day, like a sari-sari store, a terminal, a palengke, a school gate, or a busy barangay center.
Piso WiFi Business Requirements and Permit
Piso WiFi is allowed in the Philippines if it is managed properly. TP-Link advises using a valid ISP connection in your name or business, registering with the DTI or SEC, and adhering to local barangay or municipal regulations.
For the majority of novice operators, this is the straightforward route:
Register as a sole proprietor with the DTI, which TP-Link states costs under ₱1,000 for the majority of first-time operators.
Utilize an ISP connection under your personal name or your company’s name. Avoid utilizing a line that is shared or borrowed for a paid service.
Verify your barangay and municipality initially, as local regulations and permits may vary by location.
How To Setup Piso Wifi Machine – Step By Step Guidance
This part will explain the Piso wifi Installation process in a simple and easy way, so that the new starter can also understand its three different phases.
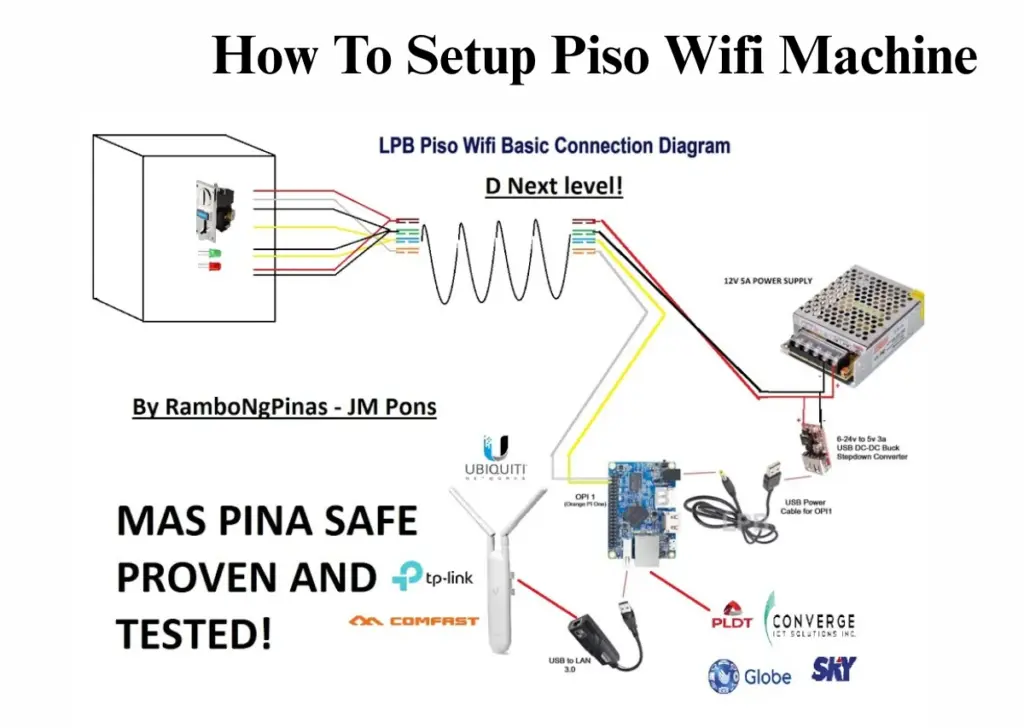
Setup has only three parts: hardware > router > system settings. Do them in this order, then test the machine before you open it to customers.
Phase 1: Hardware Installation
Mount the machine at eye level, near a power outlet, and in a place safe from direct rain.
Then connect it like this:
ISP modem > Piso WiFi router > coin slot board, with a LAN cable
If you use 4G/LTE, put the SIM straight into the router. You do not need a separate modem in that case.
Phase 2: Router Configuration
Now one of the important steps of setting up your newly arrived device is to carefully setup its user name and passwords.
Connect to the machine WiFi > Open your browser > Type 10.0.0.1 > Set your WiFi name (SSID) and password > Save
After that, check the security settings once. Change the default admin password too, and keep it private.
Phase 3: Setting Up The System
This part is a little tricky and confusing that misdirects many people. Most Piso WiFi owners do not use the TP-Link Omada method. They use their own system, like LPB, AdoPiSoft, or JuanFi, from the admin panel.
For LPB, AdoPiSoft, and JuanFi, the flow is:
Open 10.0.0.1/admin > Set your rates > Turn Pause Time on or off > Set the speed limit > Create vouchers, if you use them > Save
Only use the Omada voucher method if you run TP-Link EAP access points with the Omada controller.
For a voucher portal, the path is:
Settings > Wireless Control > Portal > Voucher Portal > Voucher Manager > Create Vouchers > Set download and upload limits > Apply
For a local user portal, the path is:
Settings > Wireless Control > Portal > Local User Portal > User Management > Create User > Set download and upload limits > Apply
Piso WiFi Machine Home Setup
Many households in the Philippines establish a secure home Piso WiFi system not for revenue generation, but rather to manage internet access for visitors, renters, or communal living arrangements.
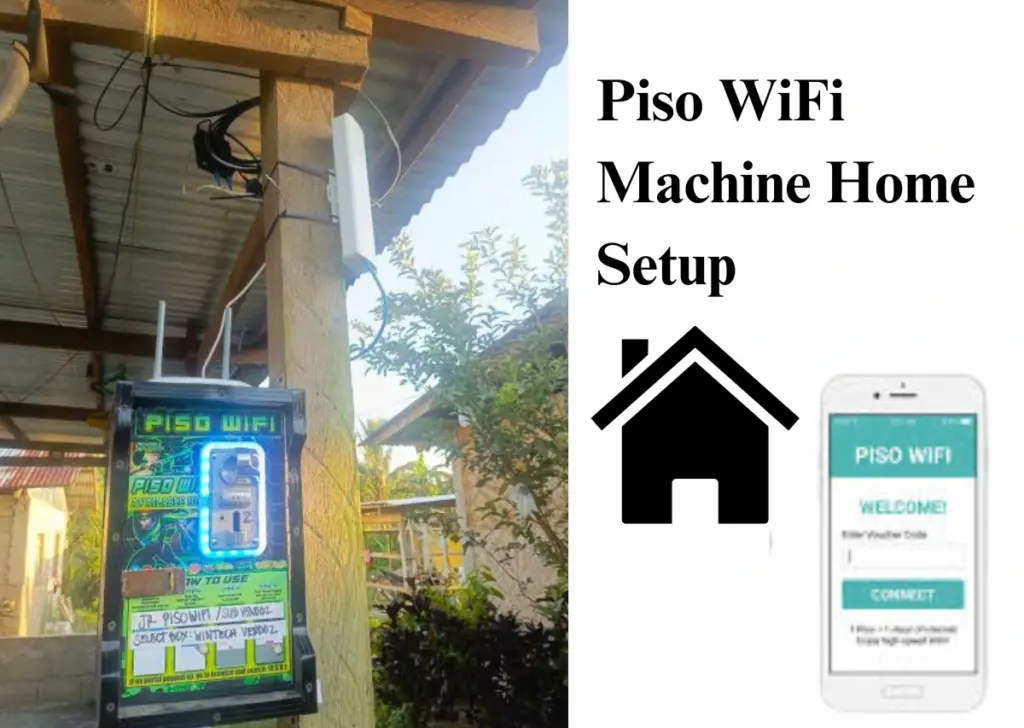
Follow the simplified steps to setup the PISO Wifi Machine system at your home:
- Get an Internet Connection: Choose a reliable internet source, such as broadband or an LTE SIM.
- Choose WiFi Software: Install a Piso WiFi management system, such as LPB, AdoPiSoft, or JuanFi.
- Connect the Machine: Plug your internet source into the machine’s WAN port.
- Configure the Settings: Turn on the machine, open the admin panel, and set your WiFi rates and time limits.
- Start Providing WiFi: Set affordable prices for customers or disable payments if you only want to control internet access.
Reason Behind Installation Of Piso Network At Home: A home Piso WiFi setup enables a family to restrict the time visitors or tenants can use it, without openly sharing the complete home WiFi password. It enables dividing charges among family members and paying tenants in communal living arrangements.
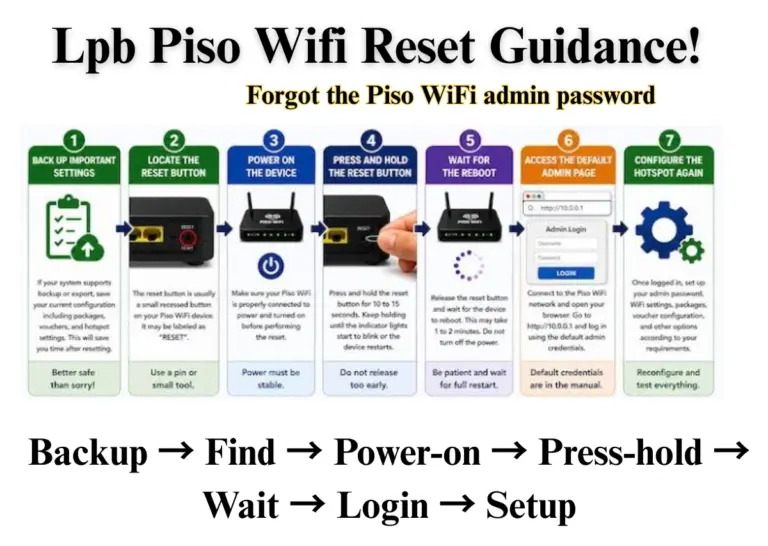
Piso wifi admin login
Operators access the admin panel via the same base IP as the client portal, appending /admin to the end (for instance, 10.0.0.1/admin). This is distinct from the screen visible to customers, ensuring that users looking for internet access never encounter it unintentionally.
Join the Piso WiFi network, using WiFi or an Ethernet cable if the device allows it.
Enhance Network
Launch a browser and enter the admin URL directly (avoid the search bar).
Input the administrator username and password. (Often admin/admin or no password on untouched boards – verify your device’s sticker or your vendor’s setup instructions initially, as defaults differ by manufacturer.)
Upon entry, you can modify rates, create vouchers, access session logs, and handle linked devices.
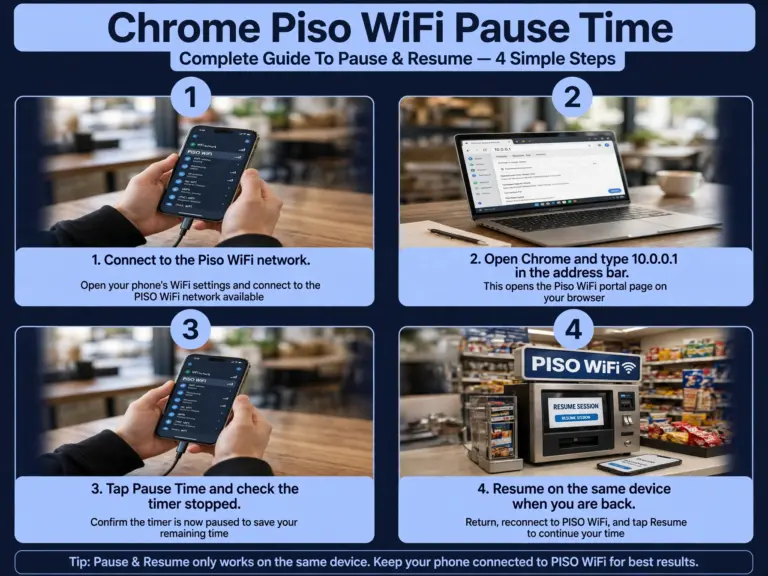
How to Stop or Pause Your WiFi Session
Stopping or pausing Piso wifi sessions is one of the crucial and beneficial steps for users to save their ongoing session time. And to do so they are obliged to step in the Piso 1 click portal where they can easily click on a given button to pause their session.
Here are the simple steps for all visitors to pause or stop the Piso wifi:
Access the client portal while connected to the home Piso Wifi network.
Enhance Network
Find the Pause or Stop button on the session display.
Press it to pause your remaining time before leaving.
Press Resume when you are prepared to keep utilizing your leftover minutes.
Piso Net WiFi vs Regular Home Broadband
They are not the same thing. One is for short, pay-as-you-go use. The other is for daily use at home. This table makes the difference clear in one look.
| Factor | Piso Net WiFi | Regular Home Broadband |
|---|---|---|
| Payment | Pay-per-use, with coins or vouchers | Fixed monthly subscription |
| Setup requirement | Minimal for users, no application | Requires an ISP application and installation |
| Speed | Shared across many users at the same time | Dedicated to one household |
| Best for | Short, occasional internet needs | Daily, heavy household use |
| Cost for heavy daily use | Adds up quickly per session | Often cheaper per hour used |
Important Settings Every Owner Should Know
Here are some of the important settings tips that every owner should know:
Rates and Time Per Coin
Here is a sample rate card for the Piso time per coin so that you can have a clear image that how a simple PISO vendo machine operated on coin system:
| Amount Inserted | Internet Access Time | Typical Use |
|---|---|---|
| ₱1 | 10 minutes | Quick check, social media scroll |
| ₱5 | 1 hour | Casual browsing, short video |
| ₱10 | 2 hours | Streaming, video call |
| ₱20 | 5 hours | Extended work or study session |
Pause Time Settings
Pause Time allows customers to stop their remaining session and resume it later on the same device. It only works if the owner turns it on in the admin panel at 10.0.0.1/admin. The owner can also set how long a pause can last. If the button is not showing, the setting is off.
Admin Login and Sales
The admin access is exclusively for the owner, located at 10.0.0.1/admin. The owner can establish rates, generate vouchers, modify the WiFi name and password, and monitor sales and total revenue from there. The administrator password should be changed by the owner on day one and kept confidential.
Pros & Cons Faced While Setting Piso Wifi Machine
While setting up Piso Wifi business is really beneficial for the shop owners, on the other hand it does have many disadvantages also if not follow it with rules and monitor it appropriately.
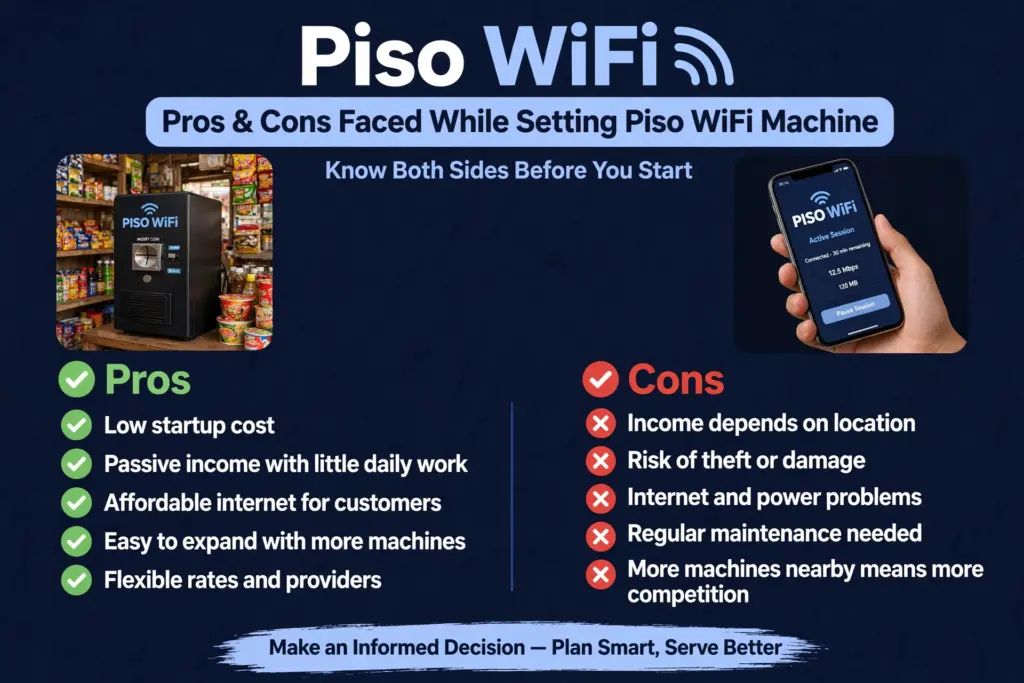
Advantages
- Low Startup Cost: A basic setup can cost around ₱15,000–₱30,000, depending on the equipment and installation.
- Potential Passive Income: Once installed, the machine can generate income with minimal daily supervision.
- Affordable Internet Access: Customers can enjoy internet access without paying for a full monthly subscription.
- Easy to Expand: You can add more machines as your business grows.
- Growing Customer Demand: Provides affordable internet access in areas where people need low-cost connectivity.
- Flexible Internet Providers: Can work with compatible internet connections from providers such as PLDT, Globe, and Converge.
- Flexible Pricing: You can set your own rates and browsing time depending on your business goals.
- Easy Customer Access: Users can connect through their smartphones, tablets, or laptops.
- Remote Management: Some Piso WiFi systems allow owners to monitor usage and manage settings remotely.
Disadvantages
- Location-Dependent Income: Earnings depend on customer demand and the number of people passing by.
- Risk of Theft: Machines placed in unsecured outdoor areas may be stolen or damaged.
- Internet Connection Issues: ISP outages and slow internet speeds can affect customer satisfaction and earnings.
- Electricity Costs: The machine and networking equipment require continuous power.
- Regular Maintenance: Routers, coin acceptors, and software may require occasional repairs and updates.
- Increasing Competition: More Piso WiFi machines in the same area can reduce your customer base.
- Uncertain Earnings: Daily income may vary depending on customer usage, competition, and operating costs.
- Security Concerns: Poor network configuration can expose the WiFi network to unauthorized access or misuse.
- Dependence on Equipment: Hardware failures or software problems can temporarily stop your business.
Conclusion
Piso WiFi is a simple and affordable way to provide internet access in the Philippines. Whether you want to start a small business or manage internet access at home, it offers a convenient solution. With the right machine, a stable internet connection, and proper setup, you can make the most of your Piso WiFi system. Just remember to choose a good location, manage your settings, and keep your equipment secure for the best results.